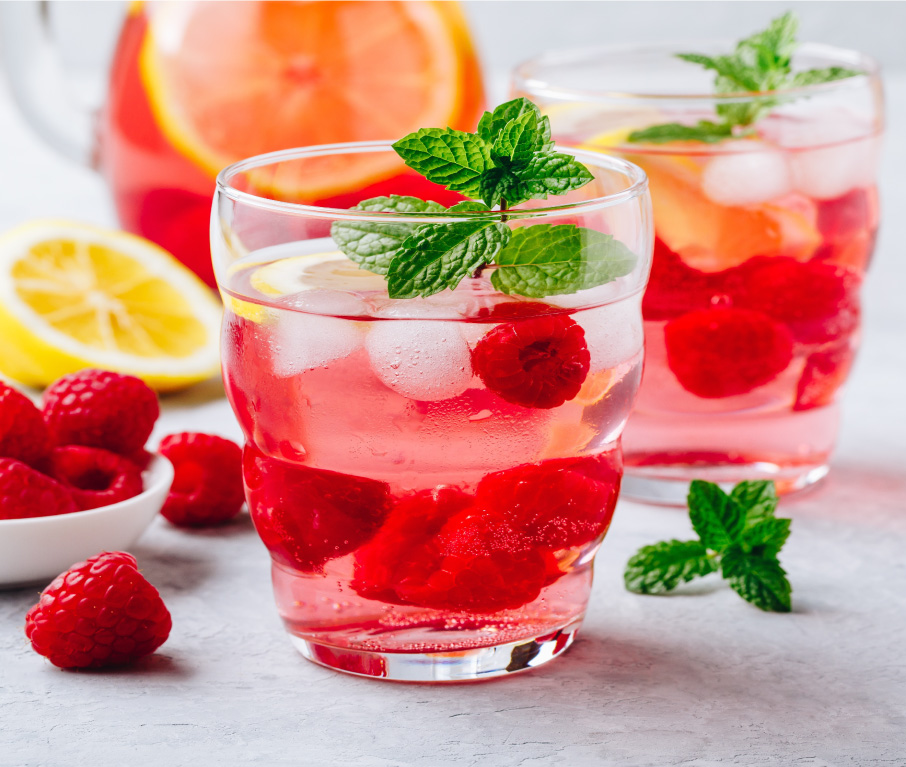
Works with any fruit!
Makes approximately 1 cup
Ingredients
- 1/2 cup (4 oz) Raspberry Shrub (recipe below)
- 1 cup (8 oz) Prosecco, Sparkling Rosé Wine (chilled), club soda, sparkling water, or tonic water
- A squeeze of fresh lemon or lime juice – optional (if you would like some slight tartness)
- Ice
- Fresh mint to garnish
- A handful of fresh raspberries to garnish
- Slice of lemon or lime wedge to garnish
Instructions
- Pour 1/4 cup of raspberry shrub into the bottom of a tall glass.
- Add ice and top with your liquid of choice.
- If using, squeeze in fresh lemon or lime juice
- Stir to combine
- Garnish with fresh raspberries, mint leaves, and sliced lemon or lime wedge
Shrub Ingredients
- 1 cup of The Olive Junction White Raspberry Balsamic Vinegar
- 1 cup of granulated sugar
- 2 cups of fresh or frozen raspberries (or fruit of your choice)
Instructions
- Combine raspberries and sugar in a medium bowl. Mash well with a fork, cover with plastic wrap, and refrigerate overnight. If using frozen raspberries, either thaw them at room temperature or place them in the microwave for 1 – 2 minutes. Once thawed, mix with sugar and follow the same directions above.
- After marinating overnight, add vinegar and stir well. Strain the mixture through cheesecloth or a fine (non-metal) sieve into a clean bowl. Press down on the berry mixture to extract as much juice as possible. Crushed berry mix can either be discarded or used in jam, compote, or mixed into muffins, bread, loaves, or even cobbler.
- Store shrub in a clean, preferably sanitized (boil jar and lid for 10 mins), glass jar in the fridge. Should last, if it’s not all consumed, for approximately 6 months.
Related Products
-
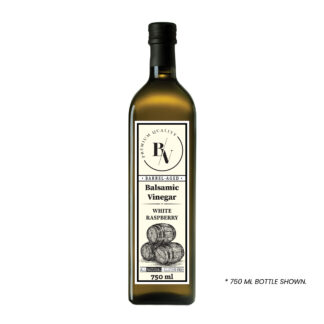 White Raspberry Balsamic VinegarPrice range: $11.00 through $45.00