Posted on Leave a comment

Cast Iron Pizza & Dough recipe

Homemade pizza in less than 2 hours from start to finish? Absolutely. This dough recipe is fool-proof and results in the most delicious, fluffy, soft, and reminiscent of the old Pizza Hut pizza days vibe.

Make pizza night a family affair and enjoy your home-baked cast iron pizza (it can be cooked on a pizza stone or in any other oven-proof dish if you don’t have a cast iron pan), while saving you some money. Plus, the intoxicating smell of pizza baking in your oven is just as good as a freshly baked loaf of bread!

DOUGH

INSTRUCTIONS

  • In your stand mixer, put water, yeast, sugar or honey, 1 cup of flour, and milk into the bowl
  • Give the mix a quick whisk to incorporate all the ingredients
  • Set aside and allow the yeast to activate for 10 minutes
  • Add the yogurt, Extra Virgin Olive oil, and then the remaining flour, and then the salt – salt kills yeast so make sure it is the last ingredient that gets added to the bowl
  • With the dough hook attachment on your mixer, mix the dough on low for 2 to 3 minutes
  • While the dough is mixing, take a large bowl and add about a tablespoon of oil to the bowl. This bowl will house the dough when it’s rising
  • Once the dough is thoroughly mixed, use either a dough scraper, stiff spatula, or an oiled hand, and move the dough to your oiled bowl – this dough can get very, very sticky and that’s ok. I’ve had this dough come out super sticky and well incorporated and either way, I’ve never had an issue with it (foolproof!)
  • Cover the bowl with plastic wrap and place in a warm area to proof until it’s doubled in size
  • Remove dough once it’s proofed onto a well-floured surface
  • Sprinkle flour on the top of the dough to reduce the tacky/stickiness
  • Form your dough enough so that you can easily divide it into however many portions you need
  • Once you have your dough portioned out, in a well-oiled cast iron pan or whatever dish you are using, place the dough inside and shape
  • Preheat your oven with the rack in the middle position to 400-425 degrees
  • You are now ready to start adding your toppings
  • Once your pizza is ready to be baked, place it in the oven for between 10-15 minutes or until the top is nicely browned, the edges are cooked and the underside is nice and golden (everybody’s oven is different and times will vary). If the top is cooked but the underside is still a few minutes away, you can do 1 of 2 things: either cover the top with loose foil so that it doesn’t burn, or remove the cast iron pan from the oven, place it on the stovetop, turn it on, and continue cooking the crust until your desired doneness is reached.
  • With a pizza cutter, cut the pizza into slices and serve – be careful, it will be very hot
  • ENJOY!!!

TIPS

  • If your dough is extra sticky and well, sticking to everything including your fingers, rub them with flour – this will remove the excess dough from your hands and will also work with any of your kitchen equipment that has dough stuck to it, such as the dough hook and bowl
  • Do not let the leftover wet bits of dough go down the kitchen drain – it will not break down and will gum up your pipes. Put any bits of dough in the garbage.
  • Try swapping out the salt and Olive oil for flavored salts and oils. I’ve made dough with The Salt Cellar Mais Oui blend and The Olive Junction Tuscan Herb Olive oil and wow, what a huge difference a small change makes.
  • Don’t have tomato sauce? Don’t worry. Our absolute favorite sauce to use on pizza is Salsa Verde. You could use a Butter Chicken sauce, regular Salsa, Bbq sauce, Alfredo sauce, or whatever – don’t be afraid to experiment!
  • If using vegetables as your toppings that naturally contain a lot of water, such as mushrooms, tomatoes, zucchini, etc, try adding them on the top layer, not as the first layer. This will allow the heat to help some of that water evaporate so your pizza won’t get soggy. Also, try sauteing your mushrooms before adding them. That little bit of caramelization adds to the flavor!
  • Try using different cheeses, not just Mozerella. Goat feta melts better than Cow feta and isn’t as sharp. Monterey cheese has an amazing melt to it. Even Brie and Camembert cheese are delightful on a pizza and melt very well (these both pair well with fresh figs and then finish with arugula once pulled from the oven).
  • Have fun and even make it a family affair. This dough can be portioned into individual pizzas and everyone can then choose their own toppings
  • If you are adding meats to your pizza such as chicken, beef, pork, etc, make sure they are all pre-cooked
  • Sliced deli meats are a great option – pepperoni, salami, and ham, are all great options
Posted on Leave a comment

Easy Homemade French Loaf

Fresh baked French loaf

There is just something special about the smell of freshly baked, homemade, bread. The way the aromas fill the air and invoke thoughts of slicing into the warm, soft, delicious loaf. Slathering it with butter and taking that first bite. It’s just heaven.

This recipe comes together rather quickly. So if you’ve got a craving for some soft, delicious, fresh homemade bread, give this a try. It’s a pretty hands-off recipe with most of the time left to the rise-and-bake portion. So, what are you waiting for?! Just make sure you read the recipe and instructions all the way through before starting and have all your ingredients measured out and ready to go – mise en place.

INGREDIENTS

2 tbsp sugar or honey

1 tbsp instant yeast *

2 1/4 tsp salt **

2 1/4 c 110-115 degree warm water

5 1/2 – 6 c of AP or bread flour ***

2 tbsp The Olive Junction Tuscan Herb Olive oil

* Make sure your yeast is active – if it doesn’t “bloom” within a few minutes of placing it in some warm water, it’s no good.

**This is a guide on how much salt to use. Different salts, table vs kosher for example, will provide you with varying amounts per tsp as the crystal structure is different with them.

***The temperature, humidity levels, elevation level, etc will have varying degrees on the amount of flour you will need to use. Start with the minimum, and based on the look and feel of your dough determine if you need more. You want your dough to every so sticky/tacky to the touch, supple, soft, and doesn’t leave much residue on your fingers.

DIRECTIONS

  • In your stand mixer fitted with your dough hook, put the sugar/honey, yeast, and water in. Combine for a minute. Turn off. If using active dry yeast, allow it to bloom (foam) for approximately 5 minutes. If you are using Instant yeast, you can skip this step and proceed to the next.
  • Add your oil, salt, and 3 1/2 cups of your flour. Turn your mixer on low to combine. Gradually add 1/2 cup at a time until you’ve added 5 1/2 cups total. If your dough hasn’t cleaned the sides of the bowl and formed a soft ball, add more flour. We recommend doing this in tbsp increments to prevent adding too much flour. Once the dough clears/cleans the sides of the bowl and leaves very little residue on your fingers, it is ready to be kneaded.
  • Remove the bowl from the stand mixer and the dough from the dough hook. While the dough is in the bowl, knead for approximately 2-3 minutes until your dough is smooth.
  • FIRST RISE: take a clean bowl that will accommodate the dough rising to double its current size. Grease the bowl with our Tuscan Herb Olive oil. Place the dough in the bowl and roll it around in the oil until the entire ball is coated. Cover with plastic wrap and let the dough rise until it has doubled in size – usually about an hour or so depending on the temperature of your kitchen.
  • Once your dough has doubled in size, remove it from the bowl onto a lightly greased surface (a silicone baking mat works great for this) and divide it in half. Working with 1 at a time, using your hands, shape the ball into a rectangle. Roughly about 9 inches tall and 12 inches wide. Starting with the long edge, roll the dough into a log and remove any air bubbles as you go. If you get a seam or overlap of dough as you roll it into a log, press those out with the heel of your palm. Once the dough is rolled up, pinch the edge of the roll to the “log” to seal together and pinch the ends of your roll together to seal. Place roll, seam side down on your lined baking sheet.
  • With a very sharp and clean knife, bread lame, or razor blade make several diagonal cuts along the top of the loaf. Cover the loaves with greased plastic wrap. Start to preheat your oven to 375 and place a rack in the center position while you wait for your second rise.
  • SECOND RISE: let loaves rise for about an hour or so. You want them to double in size. If you forgot to cut slits into your loaves before the 2nd rise, you can do this now, however, take note that you may deflate the loaf if your knife is not sharp enough.
  • Once your second rise is finished, feel free to do an egg wash (optional) on each loaf before placing your loaves in the oven. Bake for approximately 25 – 30 minutes until golden brown and baked through. If you find that your loaves are not browning as much or as quickly as you’d like, turn your loaf pan halfway, and/or you can turn the heat up to 400 – 425 degrees but be mindful to watch your loaves more closely as you don’t want them to burn.
  • Once baked to your desired doneness, remove from the oven and place on a wire cooling rack.
  • ENJOY!
Posted on Leave a comment

Chimichurri sauce

Chimichurri sauce

If you haven’t tried this incredibly easy, yet super versatile and delicious sauce – what are you waiting for?! With a handful of fresh ingredients, a food processor that does all the work for you, and a flavor profile that takes your dishes to a whole new level, you’ll be making this on the regular.

And, it’s healthy for you too. It’s keto-friendly, gluten-free, paleo, whole 30, dairy free, full of antioxidants, vitamins A & C, calcium, iron, heart-healthy garlic, and the good fats (monounsaturated) found in olive oil, along with the polyphenols, anti-inflammatory benefits, and so much more.

Ingredients

1 c roughly chopped parsley

8 cloves of roughly chopped garlic – or more if you love garlic, just not less

2 shallots roughly chopped

2 tsp of dried oregano

2 small red chili peppers roughly chopped (deseed if you don’t want too much to heat)* see tip below

6 tbsp The Olive Junction Red Wine Vinegar

2 tsp salt

1 tsp freshly ground black pepper

1 1/3 c The Olive Junction Arbequina Extra Virgin Olive oil

Directions

Add everything except the olive oil to your food processor or blender. Pulse until all ingredients are finely minced. You don’t want to take this so far that it turns into a paste, which will happen if you over-process it.

Transfer minced ingredients to a bowl and add our Arbequina Extra Virgin Olive oil. Mix together gently to combine all ingredients.

Let sit, covered, for at least 30 mins so the ingredients have time to mingle and get to know one another.

Pairs very well with our Garlic Flank Steak recipe

*Chili deseeding tip: place chili in between your palms and apply a small amount of pressure, roll the chili gently between them for a few seconds to release the seeds from the pith. Remember to either wear gloves or wash your hands very well after cutting and touching chilis.

Posted on Leave a comment

Garlic Flank Steak

Garlic Flank Steak

It’s grilling season! What isn’t better than a perfectly grilled steak? One that melts in your mouth, is full of flavor, and has you coming back for more? Sorry vegans, vegetarians, and non-meat eaters.

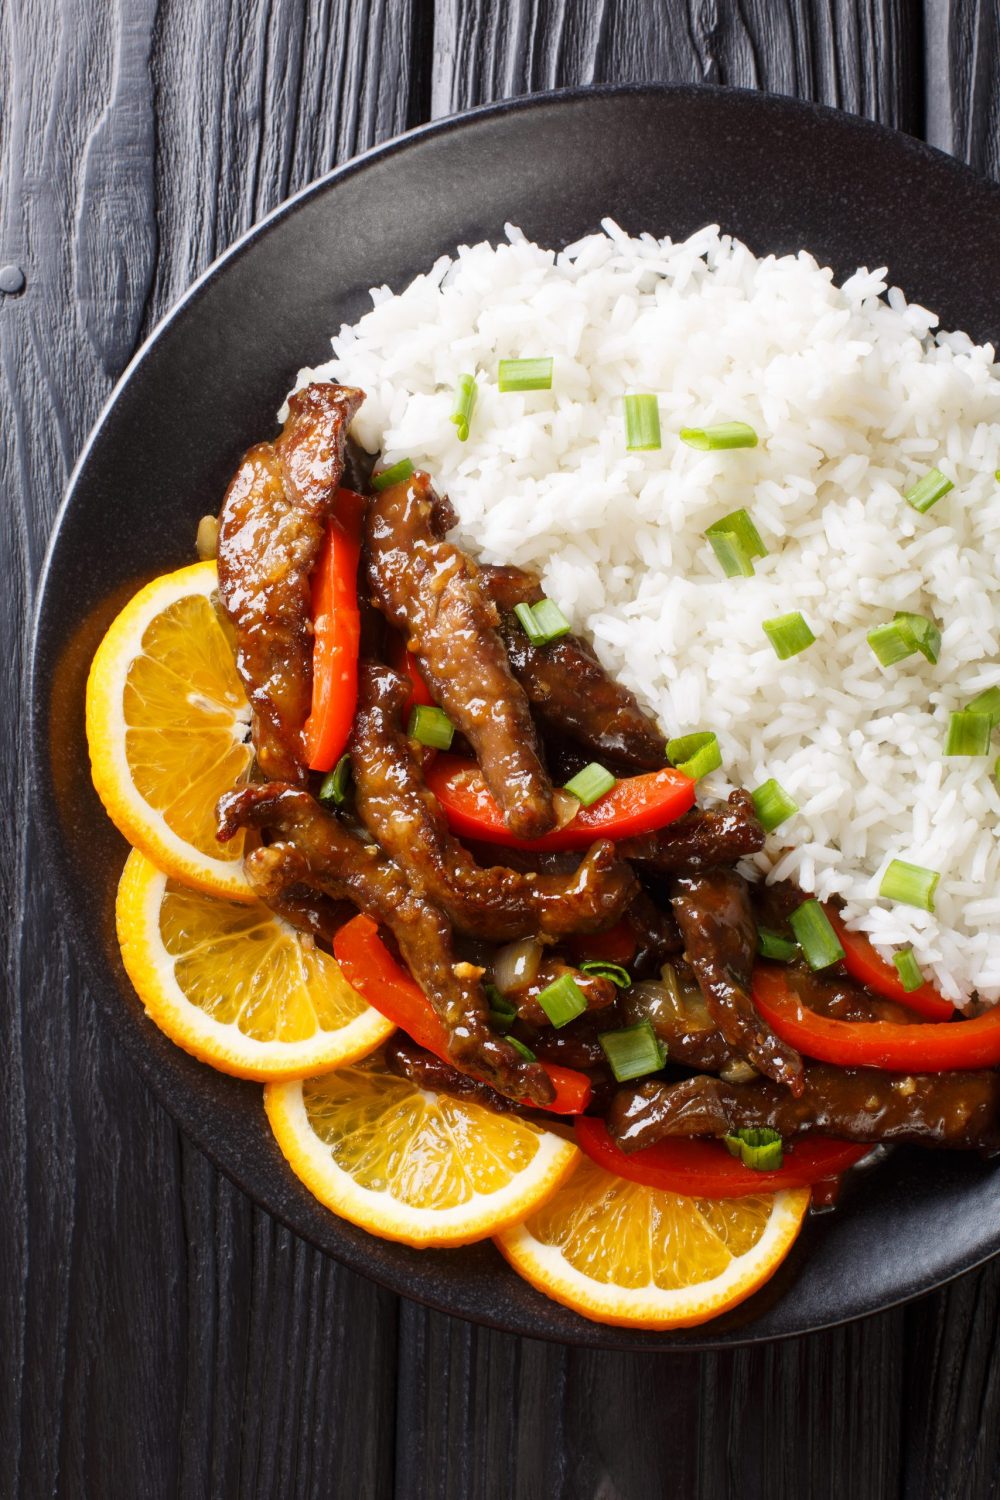
If you’re short on time, Flank Steak should be your go-to. Easy to prep, rich, delicious, juicy, quick to cook, and versatile. Like 5-6 minutes quick! Tacos, fajitas, salad, mashed or baked potatoes, grilled or roasted vegetables, soups – the options are endless!

Steak (red meat in general) contains key nutrients. Zinc, vitamin B12, and complete protein (all the essential amino acids we humans need). Of course, red meat should be eaten in moderation. It can have some adverse effects if eaten in high levels and quantities.

Ingredients

2 lb Flank Steak

4 cloves of garlic – or more if you love garlic as we do

1 tsp cumin powder

1 fresh Jalapeno Pepper deseeded and chopped* see tip below

1/2 c fresh chopped Cilantro or Parsley

2 tbsp The Olive Junction White Garlic Balsamic Vinegar

2 fresh limes juiced – roll on the counter using your palm. Apply pressure to produce more juice inside before juicing

3/4 c The Olive Junction Harvest Garlic Olive Oil

Maldon sea salt flakes to taste – available in store

Freshly Ground Black Pepper to taste

Directions

First, find a dish that will fit your Flank Steak perfectly – not too big or small. You want it to lay flat as it marinades. Combine all your ingredients together (minus steak). Taste for seasoning and add salt and pepper to taste. Remember, flavors get stronger and more intense over time so make sure to add salt accordingly.

Place your Flank Steak in the dish and turn to coat well. Using a spoon, place some of the marinade on top of your steak and spread it around. Cover and refrigerate for a minimum of 2 hours or longer. At the halfway marination mark, remove the steak from the fridge, and turn the steak over in the marinade. Recover and refrigerate until ready to grill or cook in your skillet on the stove.

Remove steak from fridge. Preheat your Bbq or skillet well. Brush with The Olive Junction Harvest Garlic Olive Oil. Remove excess marinade from the steak simply by giving it a light shake. Salt and Pepper on both sides, place directly on the grill and set your timer. Remember, this cut cooks very fast and you really don’t want to overcook it.

Cook for 2 – 3 minutes on each side for medium-rare, only 1-2 minutes more per side for well done.

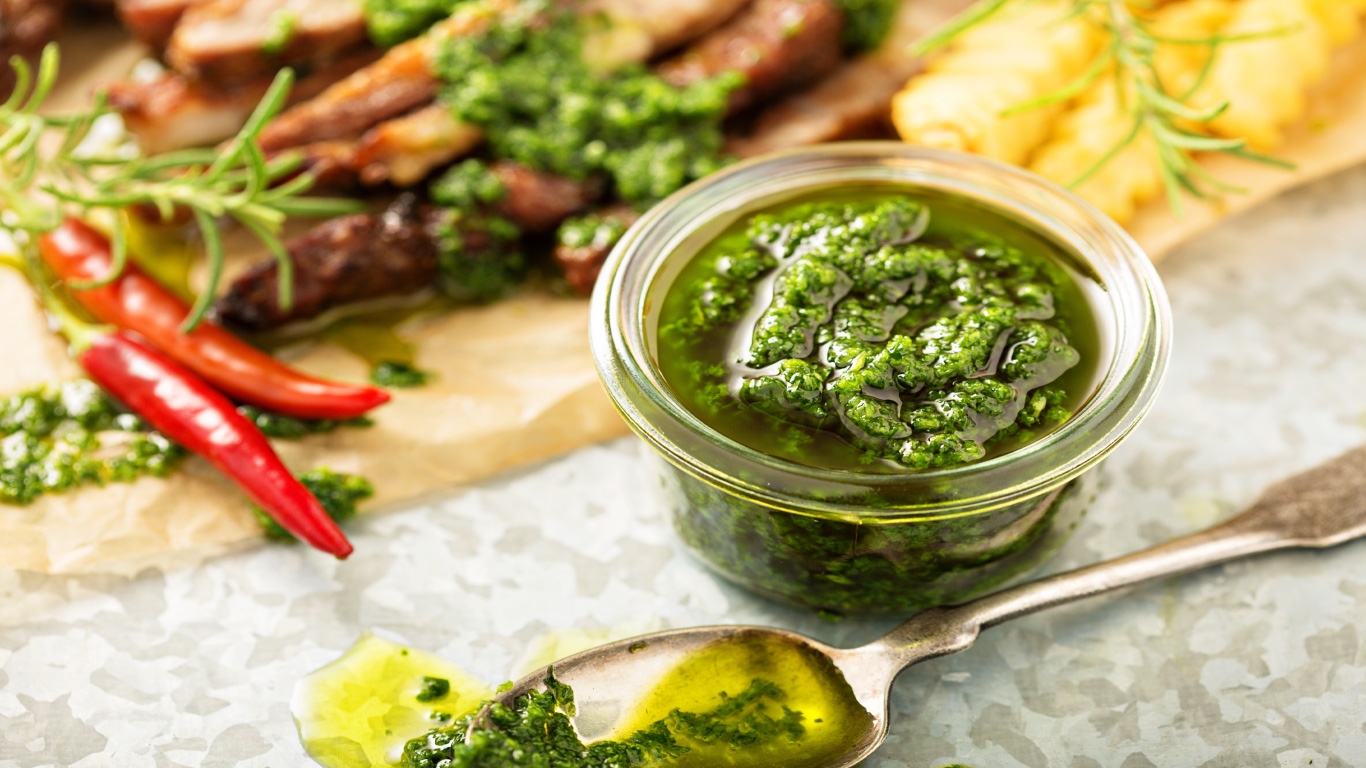
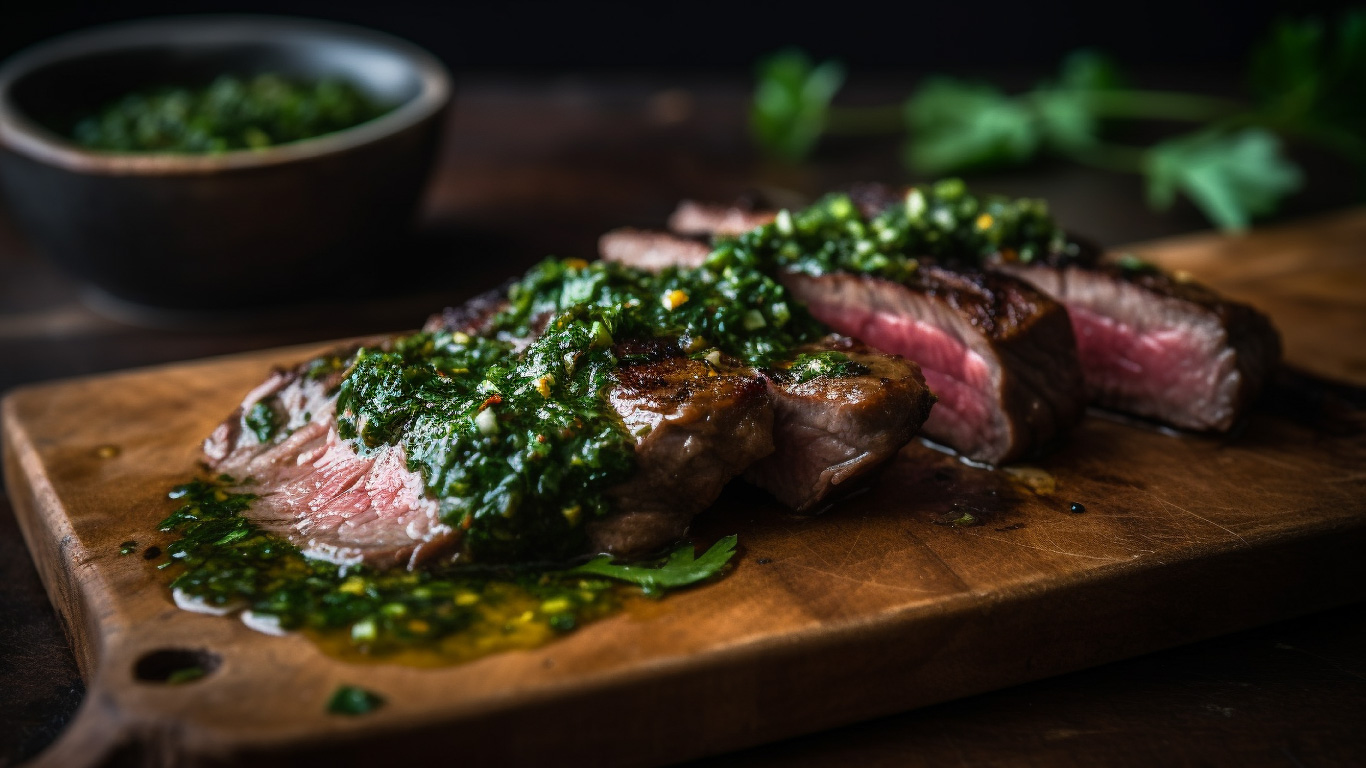
Place meat on a cutting board, tent with tin foil, and let rest for 5-7 minutes. Thinly cut your Flank Steak across the grain, and gently fan out your slices. Drizzle with our Chimichurri sauce and a sprinkling of Maldon Sea Salt Flakes, and freshly cracked pepper, and enjoy!

*Chili deseeding tip: place chili in between your palms and apply a small amount of pressure, roll the chili gently between them for a few seconds to release the seeds from the pith. Remember to either wear gloves or wash your hands very well after cutting and touching chilis.

Posted on Leave a comment

Hummus Dip

This famous Middle Eastern dip is full of health benefits, easy to make, delicious, and versatile. Made with just a handful of ingredients that you probably already have in your pantry. This thick, creamy, savory, exotic delight may just become your new “go-to” for veggies, pita chips, pretzels, bread sticks, and sandwiches, or try it thinned out with more olive oil for a very healthy swap for salad dressings.

Just a few of the health benefits Hummus has in store:

  1. Packed with plant-based protein
  2. Helps lower cholesterol when eaten in moderation
  3. Alleviates Anemia thanks to the high Iron content in the chickpeas
  4. Balances your blood sugar levels due to the presence of omega-6 fatty acids
  5. Full of key vitamins such as calcium, iron, folate, zinc, and B vitamins
  6. Tahini contains vitamin E
  7. Full of fiber – because, well, beans 😉
  8. Helps reduce inflammation – thank you sesame seeds (tahini)

Ingredients

  • 1/4 cup freshly squeezed lemon juice
  • 1 clove of garlic (or more – your preference)
  • 1/2 tsp ground cumin
  • dash of ground paprika, red pepper flakes, parsley, toasted sesame seeds
  • additional olive oil for serving

Directions

  • In either a food processor or blender, combine the tahini and lemon juice. Process for 1 minute, scrape down the sides, turn on again, and process for 30 seconds – 1 minute longer (this will help make the hummus become extra creamy)
  • Add in your 2 tbsps of oil of your choosing, garlic, cumin, and salt
  • Process for 30 seconds, turn off, scrape down sides, turn on again, and process for up to 1 minute
  • Drain and rinse chickpeas under water well with a strainer
  • Add 1/2 of the chickpeas and process for 1 minute, scrape down sides and bottom if possible
  • Add remaining chickpeas and process for 2 minutes or longer until thick and smooth, stopping to scrape down the sides as needed
  • Hummus will be pretty thick at this point, add 1 tbsp of water at a time until desired consistency is reached
  • Place Hummus onto a plate or serving dish, finish off with a drizzle of oil and a sprinkling of your herb or choice
  • Serve with warmed pita chips, fresh veggies, and pretzels, or use in a sandwich as a spread
Posted on Leave a comment

Meyer Lemon Olive Oil White Chocolate Mousse

A bright, light, smooth, refreshing, decadent twist for the non-milk or dark chocolate lovers. This twist on the classic will definitely put a smile on your face, and have you yearning for the long, warm days of summer. The addition of Olive Oil makes this the creamiest Mousse you have ever had. 3 simple ingredients and all the heart healthy properties of Olive Oil – who could say no to that.

Ingredients

  1. 1/2 cup of The Olive Junction Meyer Lemon Olive Oil
  2. 1 cup of heavy cream
  3. 1 generous cup of good quality White Chocolate

Directions

  1. Over a double-boiler, gently melt the Chocolate – stirring consistently. Let cool slightly once all melted.
  2. Stir in the Olive oil.
  3. Whip the heavy cream until soft peaks form.
  4. Add the melted Chocolate and Olive Oil to the whipping cream.
  5. Gently fold together until just blended.
  6. Place in individual cups, bowls, martini glasses, champagne flutes, stemless wineglasses, ramekins, mason jars, tea cups, or whatever you fancy!
  7. Top with either shaved chocolate (tip: use a veggie peeler), fresh berries, additional whipping cream, a few fresh mint leaves, biscotti crumbs, candied citrus peel, crushed candy canes, skor bits, mini chocolate chips, etc.
Posted on Leave a comment

Butter to Olive Oil Conversion Chart

Make a heart-healthy switch in your recipes

Did you know you can make a heart-healthy, and delicious switch when your recipe calls for butter? Substitute Olive Oil in your recipe with the ratios given below. Adding Olive Oil instead of Butter to your recipe will result in the most delicious and moist baking you’ve ever done. And, if you can honestly not touch your delectable creation for a minimum of 12 hours, you’ll be in for the most incredible, moist, “omg, what have I been missing” confection.

Try our beautiful and mild Arbequina for a delicate touch, or for a little more robustness, our Robust Koroneiki. For an additional pop of flavor to your sweet treats, try either our Meyer Lemon, Lemon Butter, Blood Orange, California Lime, Chocolate, or Butter Olive Oils. For your savory dishes, try either our Harvest Garlic, Lemon Pesto, Lemon Butter, Garlic Butter, Basil, Rosemary, Oregano, or Tuscan Herb Olive Oils. Like a little spice? Try our Citrus Habanero, Thai Chili, Habanero, Jalapeno Garlic, or Garlic Habanero Olive Oils.

Butter or Margarine

Olive Oil

1 TEASPOON

1 TABLESPOON

2 TABLESPOONS

1/4 CUP

1/3 CUP

1/2 CUP

2/3 CUP

3/4 CUP

1 CUP

3/4 TEASPOON

2 1/4 TEASPOONS

1 1/2 TABLESPOONS

3 TABLESPOONS

1/4 CUP

1/4 CUP + 2 TABLESPOONS

1/2 CUP

1/2 CUP + 2 TABLESPOONS

3/4 CUP

Posted on Leave a comment

Meyer Lemon Layer Cake by Evelyn Zimmer

Recipe Cover Photo

Makes 1 cake 8″ x 8″

Ingredients

FOR THE CAKE:

  • 1 package lemon cake mix
  • 1 cup water
  • 3 large eggs
  • 1/4 cup The Olive Junction Meyer Lemon Olive Oil
  • the juice and zest of 1 large lemon
  • 1 jar of lemon curd minus 2 tbsps set aside for plating

Instructions

  1. Preheat oven to 325* F
  2. Grease sides of two 8″ x 8″ pans and line with parchment paper
  3. Mix cake mix with water, eggs, Meyer Lemon Olive Oil, the juice and zest of the lemon.
  4. Mix on low until moistened, and then beat on medium-high for about 2 minutes.
  5. Pour equal amounts into each pan
  6. Bake for 20-26 mins or until a toothpick comes out clean from the center of the cake
  7. Remove from the oven and place on a wire rack to cool
  8. Once completely cooled, remove from pans and using a very long sharp knife or thread, cut each cake in half.
  9. Separate each cut layer and place them on a breadboard or piece of hard cardboard. You will need to flip these pieces over.
  10. Wash and dry one of the cake pans. Re-line the pan with parchment paper that is at least 4 inches longer than the sides. These will be your handles when you remove the cake from the pan!
  11. Place 1 layer of cake in the pan
  12. Spread 1/3 of the lemon curd on the cake.
  13. Carefully, lift and place another piece of the cake on top of the lemon curd.
  14. Spread another 1/3 of the lemon curd on the new cake layer.
  15. Again, carefully, add the 2nd to last cake layer to the lemon curd.
  16. Spread the remaining lemon curd, minus the 2 tbsps that were put aside, onto the new cake layer.
  17. With the last piece of cake, place the flat side of the cake facing down.
  18. Remove your beautifully layered cake from the cake pan by lifting with the extra parchment paper as your handles and place on a serving tray.
  19. Make your icing.

Ingredients

FOR THE ICING:

  • 1/2 pint of whipping cream
  • zest of 1 lemon
  • 4 tbsp icing sugar
  • 1 tbsp corn starch
  • Garnishes for plating if desired. Such as sliced strawberries, fresh blueberries, raspberries, lemon curd, The Olive Junctions Dark Raspberry Balsamic Vinegar, The Olive Junctions Blueberry Balsamic Vinegar, Cherry pie filling. Whatever you fancy. Use your imagination

Instructions

  1. Mix together until combined the 4 tbsps of icing sugar, 1 tbsp of corn starch, and 1/2 of the zest from the lemon.
  2. Whip the whipping cream until it forms soft peaks.
  3. Add the icing sugar mixture to the whipped cream and whip until thick and sturdy. Do not over mix!
  4. Ice the cake using a spatula, piping bag, plastic bag with the corner cut out, back of a spoon, or whatever you have!
  5. Sprinkle with the rest of the zest and place in the fridge until ready to serve.

To plate and garnish using the remaining 2 tbsp of lemon curd and Dark Raspberry Balsamic, place a thick streak of curd next to the plated cake. Place a few drops of Dark Raspberry Balsamic spaced evenly apart on top of the curd. Take a sharp knife or toothpick and drag it through the middle of the curd and Raspberry Balsamic to create a pattern. Shown in the picture below.

picture courtesy of Evelyn Zimmer
Posted on Leave a comment

Pecan Crusted Baked Salmon

Ingredients

  • 4 salmon steaks de-boned
  • 2 tsp. The Olive Junction Basil Olive Oil
  • 2 tsp. fresh lemon juice or freshly squeezed Meyer Lemon juice
  • 2 cloves garlic – grated
  • Pinch of S & P
  • 2 tsp Dijon mustard
  • 2 tsp liquid honey
  • 1/2 c fine bread crumbs
  • 1/2 c finely chipped pecans
  • 1 tsp dried parsley

The Olive Junctions Fig Balsamic for your finishing drizzle!

Instructions

  1. Pre-heat oven to 400ºF
  2. Wash and dry salmon pieces.  Rub on basil olive oil and drizzle on lemon juice.  Place in fridge.
  3. Add all the rest of the ingredients (except the balsamic vinegar) in a bowl until blended. 
  4. Place fish skin side down on a cookie sheet covered with non-stick tin foil.
  5. Cover each piece with the bread/nut mixture
  6. Bake for 11 minutes or until flaky.  (Do not over-cook!)
  7. Remove from oven and plate.  Drizzle with Fig Balsamic vinegar.

Thank you to Evelyn Zimmer for this recipe

Posted on Leave a comment

Bacon Wrapped Pork Tenderloin with Asian Orange Sauce

Ingredients

  • 2 pork tenderloins
  • 1/2 lb thin bacon

Sauce

  • 3 cloves of garlic grated
  • Zest of 1 orange
  • 1 tsp The Olive Junction Blood Orange olive oil
  • 1 tbsp Hoisin sauce
  • 1 tbsp sweet chilli sauce
  • 1 tbsp grated ginger – fresh
  • 1 tsp black bean sauce
  • 2 tbsp rice wine vinegar
  • 2 tbsp soy sauce
  • 1/4 c brown sugar
  • 1/2 c water
  • 2 tbsp cornstarch PLUS 1/4 c cold water – set aside for the end of the recipe

Instructions

  1. Wrap tenderloin with bacon strips, trying to have the ends on the bottom.  Fry in a large frying pan or a flat grill until all sides are browned.  Place on a cookie sheet covered with tin foil and set aside.
  2. Make the sauce by placing all the ingredients except the last two, in a small sauce pan.  Tweak the taste to your liking, remembering this is the strongest it will be.  When you have acquired the taste you like, place half in a small container to be used for basting only and keep the other half in the pan.
  3. Baste the pork tenderloin with the condensed sauce from the container.  Place in a 350ºF oven and bake for 15 minutes.  
  4. Remove from the oven and baste again.  Insert a meat thermometer into a thick end of the tenderloin and set thermometer for 143ºF.  Place in the oven and remove when it reaches temperature.  Remove from the oven and give a last baste.  Tent with tin foil for at least 10 minutes before slicing.
  5. The remaining sauce should be warmed up to the simmering point.  Add 1/2 C of water to dilute sauce and bring to the boil.  Make a slurry from the cornstarch and 1/4 C of water and stir into sauce until thickened.  Set aside for placing on the meat after it is cooked.  After slicing, drizzle a little on each slice and save the rest for each person to add sauce as they prefer on their dinner.

Serve with your favorite side dish. Rice, broccoli and steamed carrots are a favorite!

Thank you to Evelyn Zimmer for this recipe

Posted on Leave a comment

Orange Beef Stir-fry

Ingredients

  • 1/2 lb thinly sliced beef
  • 2 large carrots – sliced on a diagonal
  • 6 green onions – sliced on a diagonal

Marinade

  • 1/3 c. soy sauce
  • 2 tbsp The Olive Junction Blood Orange olive oil
  • Zest of 1 orange
  • 2 tbsp The Olive Junction Traditional Balsamic vinegar
  • 1 tbsp rice wine vinegar
  • 2 tbsp frozen orange juice concentrate
  • 1 tbsp cornstarch

Instructions

  1. Slice beef thinly – for ease, try putting in the freezer for 1/2 to 1 hr. prior to cutting. Do not let it freeze solid. Just enough to slice through easily
  2. Add sliced beef to marinade ingredients and marinate in the fridge for at least 1 hour
  3. Cook beef in a hot wok (or skillet) – make sure to reserve the marinade
  4. Once beef is cooked, add carrots and cook to desired tenderness
  5. Add remaining marinade and cook again for at least 2 minutes to bring all the flavors together

Serve over rice noodles or rice and top with slivered green onions.