Posted on Leave a comment

Toasting Spices

assorted whole spices

In a few short minutes, you can elevate the flavor and intensity of your whole spices before grinding them fresh and adding them to your dish.

Yes, ground spices are convenient, but the flavor of said spice quickly diminishes over time, leaving you with a very mild flavor that doesn’t really do anything for your dish. If anything, it will have you wondering why your dish just doesn’t taste the same or is lacking in flavor – even though you made this dish the same as every time previous.

Over time Oxidization occurs (think of when you slice an apple and before you get to eat it it’s turning brown – that’s Oxidization) and the once flavorful spice you loved has wilted into nothingness.

If you’re like most people and have jars, tins, bags, or containers of ground spices that have been in your cupboard since, well forever, do yourself a favor and toss them. One, there is more than likely zero flavor left in that spice, and two, it’s just taking up room in your spice cupboard.

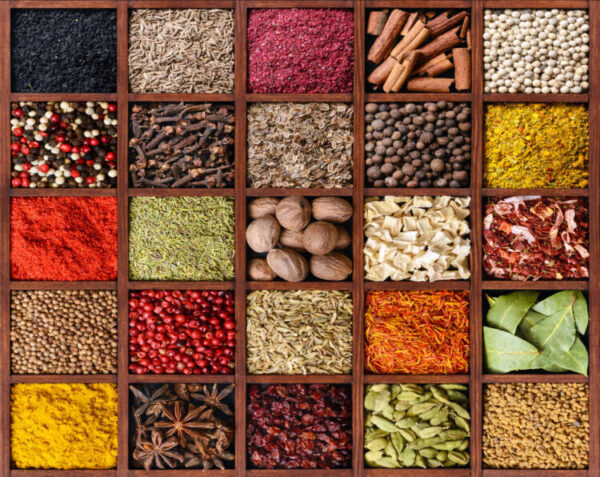
Most of us tend to have a small selection of herbs and spices that we use pretty frequently, including pepper. For the spices that you tend to graduate to on the regular, look for them as whole spices. Not only will you get more bang for your buck in the long run, but the flavor that comes from these whole, freshly ground spices honestly does not compare to the preground stuff. It really is an apples-to-oranges difference. For the spices and herbs you use on rare occasions, either look for bulk buying options and only purchase a small amount at a time, or look for an alternative spice in your collection that has similar flavor profiles. For example, Star Anise has a beautiful black licorice flavor. If you can’t find Star Anise, swap it out for Fennel. If you can’t find Fennel, look for fresh Tarragon. All 3 have a similar flavor profile that can be used interchangeably in a dish.

To take your whole spices to a whole (pun intended) new level of flavor and added excitement to your dish, toast them in a pan over medium heat for a few minutes. Follow the instructions below to toast your whole spices.

Instructions:

spices in pan on stove
whole spices in a frying pan on a gas stove
  1. Make sure the pan you are using is cold and clean. Do not use any oil or butter. We are not looking to fry the spices and herbs. You can use any pan you have handy, however, we find a heavy frying pan is just easier as it eliminates hot and cold spots and disperses the heat evenly.
  2. Place the pan with spices on the stove and heat it up to medium. You’ll start to smell the spices as they heat up. The fragrance that will fill your home on its own will have you doing this over and over. Make sure as they heat up that you gently shake the pan to move them around. Some spices will pop, some will crackle, and that’s totally ok!
  3. Keep a watchful eye on the color of the spices. Once they start to turn brown, quickly remove the pan from the stove and transfer the spices to a bowl to cool down. The residual heat will keep them cooking and toasting for a few extra minutes. If you left them in the pan until they were very toasted, the carryover heat will cause them to overcook and turn the spices bitter. This shouldn’t take you any more than 3-4 minutes.
  4. To grind them, transfer them to either a food processor, blender, or a mortar and pestle. Grind until your desired consistency.
  5. Store any leftover spices in an air-tight container and if possible, write the date you ground them up on the container or a piece of tape.

All spices will benefit from toasting them before grinding, including peppercorns!

Posted on Leave a comment

Why dry brine meat?

why dry brining your meat makes a difference

Dry Brine.

Let us talk about the magic of this amazing and simple process of dry brine for a second 🙌.

Here’s a quick rundown as to what it is and why you should at least try it once 🥩. If you’re foodies like us, we think this will be a regular thing for you too!

What exactly is Dry Brining and what does it do?

1) Well, in the simplest form, the excess moisture in the meat is drawn out by the salt and then that moisture is then reabsorbed into the tissues of the meat. This then allows all the delicious flavor of the meat to infuse throughout the meat instead of it sitting on top.

2) If you’re not cooking the creme de la creme cuts of meats such as Wagyu or Kobe beef for example, dry brining will help tenderize your meat – so it’s perfect for those more affordable cuts of any type of meat – beef, chicken, pork, etc. The process works the proteins and helps them relax and break down. The end result is a much more tender and moist piece of meat instead of a tough, chewy, and dried-out piece.

3) Cut your cooking time down. Seriously, don’t walk away. Set a timer and make sure you watch your meat. The cooking time is cut down quite drastically depending on the cut and thickness.

4) The crust 😍. The Maillard reaction helps create the most amazing crust on the meat once cooked. It’s incredible.

How do you dry brine?

1) Pat the cut of meat dry and make sure it’s fully thawed.

2) Apply salt everywhere – literally. Don’t be shy, especially if you’ve got a particularly thick cut of meat. The thicker the meat, the more salt it can take. The thinner, the less you’ll use.

3) Place the salted meat on a cooling wire rack and then place that rack on a baking tray with rimmed sides.

4) Place the tray and rack in the fridge, uncovered for up to 24 hours, but no less than 1 hour. The longer it dry brines, the better the end results.

5) When you’re ready to BBQ, pull the meat out of the fridge at least 30 minutes prior. Allow it to come up to room temperature. There is no need to add any more salt. You can add a rub or other seasonings, but ideally, have them be salt-free.

6) If you’re cooking a cut of meat with a beautiful fat cap on it, say a nice rib-eye, because the cooking time is reduced, sear the fat end first then proceed with the rest of the cook.

What kind of salt do you use?

Do NOT use your everyday, run-of-the-mill table salt such as Sifto. First, there is sugar in regular table salt and secondly, the crystal shapes of regular table salt are not ideal due to their small size.

Kosher salt is the best. The crystals of Kosher salt are much larger and shaped differently, therefore they are able to draw out more moisture.

We sell the number 1 chef’s choice when it comes to Kosher Salt in-store – Diamond Crystal Pure and Natural Kosher Salt.

1 of our favorite YouTube channels that explains dry brining perfectly is https://www.youtube.com/@GugaFoods Go check him out.

Posted on Leave a comment

Butter to Olive Oil Conversion Chart

Make a heart-healthy switch in your recipes

Did you know you can make a heart-healthy, and delicious switch when your recipe calls for butter? Substitute Olive Oil in your recipe with the ratios given below. Adding Olive Oil instead of Butter to your recipe will result in the most delicious and moist baking you’ve ever done. And, if you can honestly not touch your delectable creation for a minimum of 12 hours, you’ll be in for the most incredible, moist, “omg, what have I been missing” confection.

Try our beautiful and mild Arbequina for a delicate touch, or for a little more robustness, our Robust Koroneiki. For an additional pop of flavor to your sweet treats, try either our Meyer Lemon, Lemon Butter, Blood Orange, California Lime, Chocolate, or Butter Olive Oils. For your savory dishes, try either our Harvest Garlic, Lemon Pesto, Lemon Butter, Garlic Butter, Basil, Rosemary, Oregano, or Tuscan Herb Olive Oils. Like a little spice? Try our Citrus Habanero, Thai Chili, Habanero, Jalapeno Garlic, or Garlic Habanero Olive Oils.

Butter or Margarine

Olive Oil

1 TEASPOON

1 TABLESPOON

2 TABLESPOONS

1/4 CUP

1/3 CUP

1/2 CUP

2/3 CUP

3/4 CUP

1 CUP

3/4 TEASPOON

2 1/4 TEASPOONS

1 1/2 TABLESPOONS

3 TABLESPOONS

1/4 CUP

1/4 CUP + 2 TABLESPOONS

1/2 CUP

1/2 CUP + 2 TABLESPOONS

3/4 CUP